
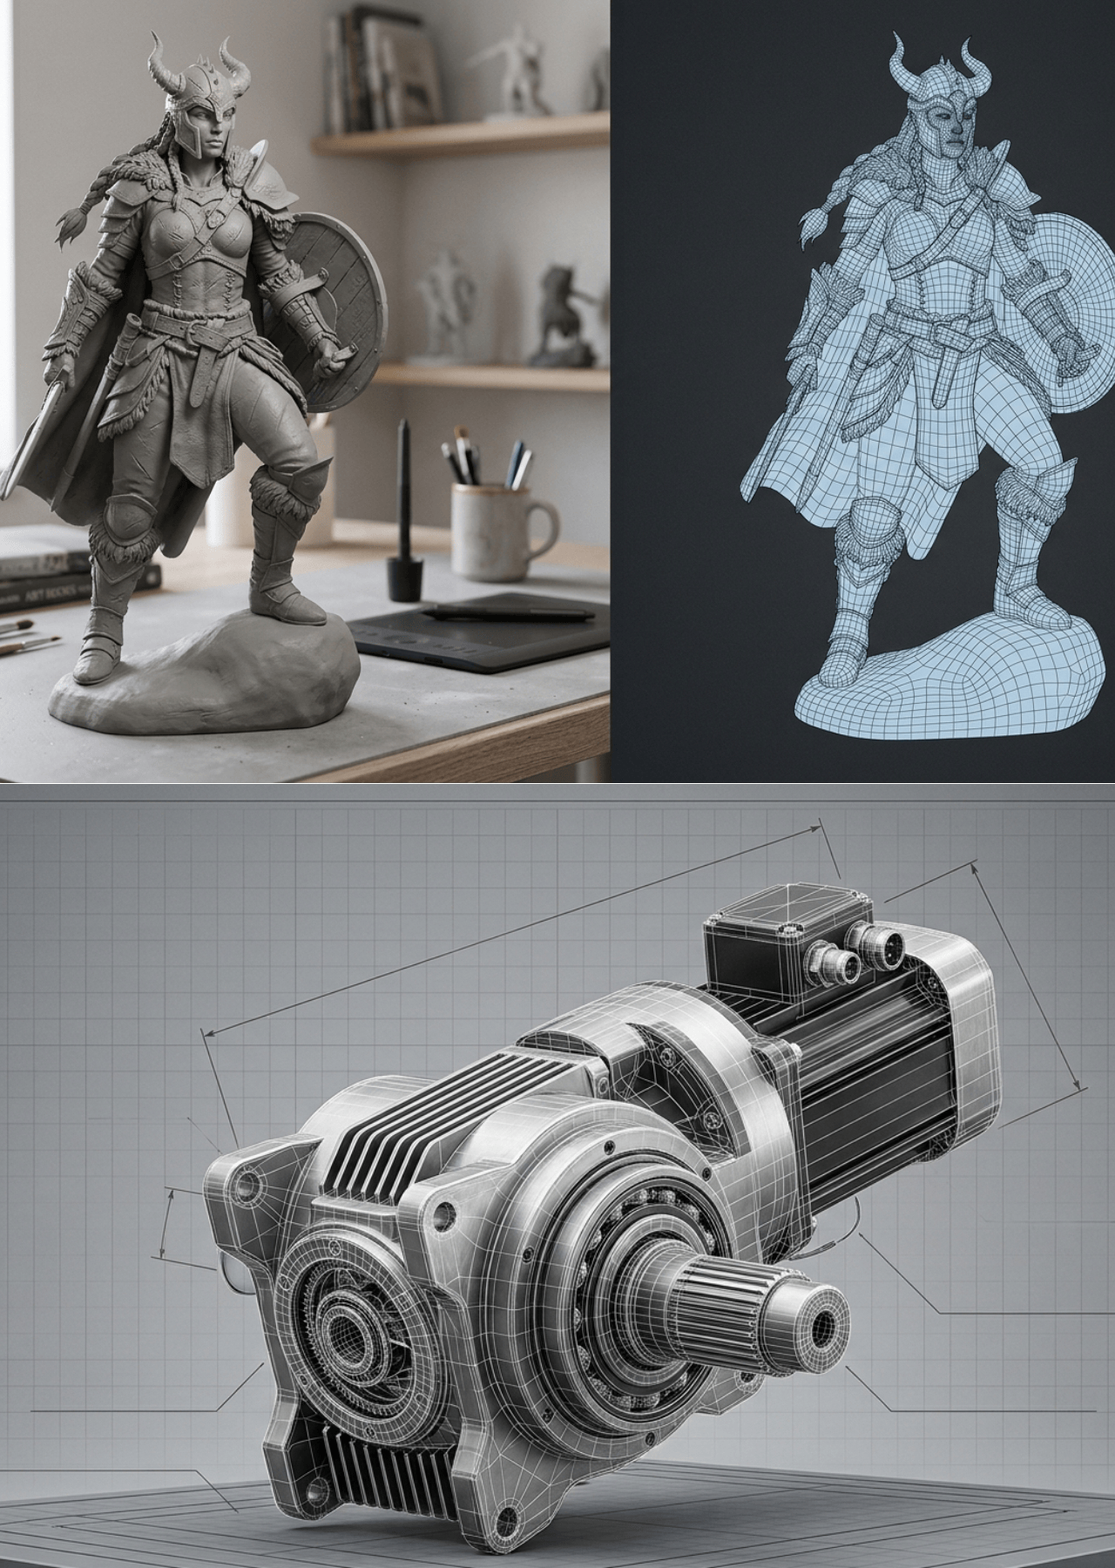
If you’re struggling to understand how to model 3D objects for games, you’re not alone. It’s incredibly intimidating to open the viewport for the first time and see nothing but a blank canvas. There’s a lot to consider throughout the pipeline, and it helps to have a general understanding of what’s expected at each stage.
Many professionals rely on these very pipelines to produce published game content. We’ll go over every step to creating a game-ready 3D model, from concept to production-ready asset. All the tools, techniques, and even the experience are included here, so you can jump right in and start building your game assets. You’ll walk away with a comprehensive knowledge of how to create 3D Models fit for a AAA engine.
How to Create 3D Models for Games?
Every single game-ready 3D model goes through the same pipeline. It’s all iterative, so rushing and skipping steps will only end up costing you more time. Let’s see what the professional approach looks like in the nine-step process.
Step 1: Decide How You Want to Model 3D Game Objects
This largely depends on what you want to achieve. There are many ways to get into 3D modeling for games, and the most suitable approach depends on the complexity of the model, existing skill, and available resources.
Method
| Tools | Best For |
| Polygon modeling | Hard-surface modeling: props, vehicles, environments |
| Digital sculpting | Organic modeling: characters, creatures, natural objects |
| AI-assisted | Rapid prototyping, indie developers |
| Procedural modeling | Terrain, vegetation, architecture |
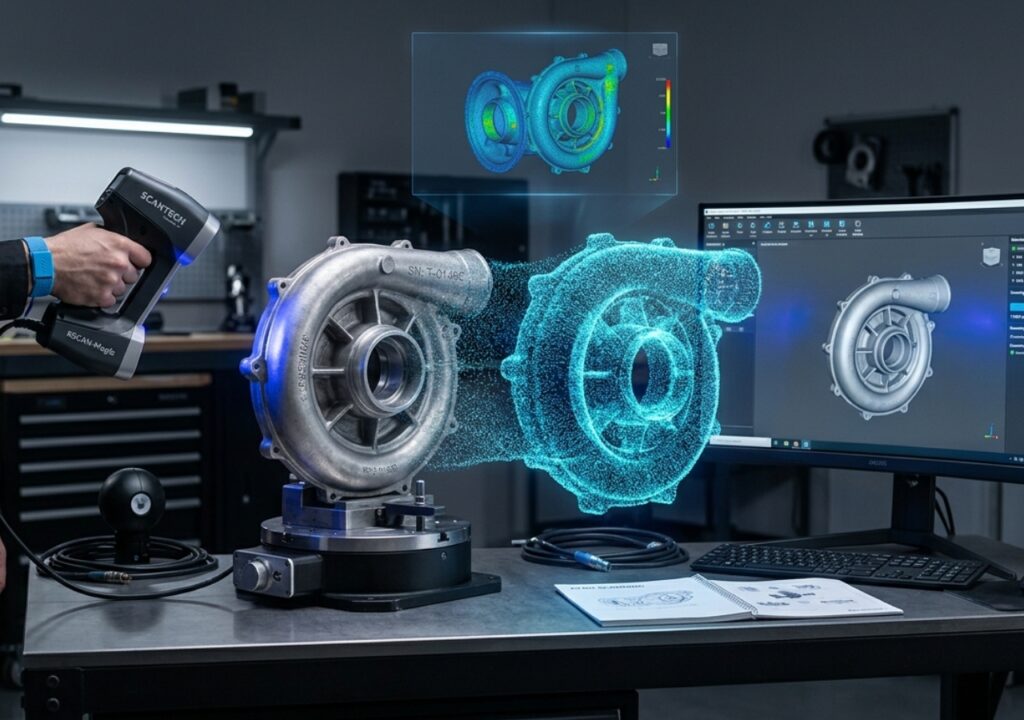
| Photogrammetry / 3D scanning | Scanned real-world objects, photorealistic assets |
Most professionals use a hybrid approach to 3D modeling for video games. One might generate a base mesh with text-to-3D software like Meshy, and sculpt and retopologize it later in Zbrush or Blender. This workflow is commonly used by an Outsource 3D Modeling provider to speed up asset production.
Step 2: Sculpt High Poly 3D Game Models
It’s time to bring your design to life by adding all the intricate details you want. This process is all about capturing the essence of your creation at the highest detail. You can worry about polygons later. The industry standard for this part of the pipeline is Zbrush. With its powerful Dynamesh, Zremesh, and vast brushes library, Zbrush has been the sculpting tool of choice for most AAA studios. Blender’s Sculpting mode is also a viable option, especially considering its availability for free.
You can use polygonal modeling to make simple and relatively low-detail assets. When a simple crate will do, there’s no need to sculpt a rock.
Step 3: Retopology: Prepare High Poly Game Assets for Real-time Rendering
High poly 3D assets usually have unreasonably high polygon counts to capture every detail. This number is usually way higher than anything a game engine can handle.
Retopology is the process of taking a detailed high poly mesh and generating a new low poly mesh with the same surface appearance. There are different approaches to this step, and the majority of professionals use a combination of the following:
- Manual retopology (Blender RetopoFlow, Maya Quad Draw): provides the best control over topology needed for 3D Model Character animation.
- Automated retopology (Zbrush Zremesh, Instant Meshes): faster and more predictable.
- AI-assisted retopology: some of the newer tools including Meshy have built-in automated retopology.
As you prepare your mesh for animation, remember to follow these tips to ensure optimal performance and flexibility:
- The character’s polygon budget should always be within the 40,000–60,000 range for most engines, unless you need more flexibility.
- Use manual retopology for characters and objects that flex. This includes clothes, hair, and other assets that need extra edge loops.
- Retopologize your high poly mesh from the inside out. Pay special attention to body parts that require extra support such as shoulders, neck, and fingers.
- Use quads for everything. Triangles can affect the surface appearance and introduce shading artifacts.
- Always test the performance and flexibility after retopology. Meshy’s preview function can help you identify issues before exporting the low poly model.
Step 4: UV Unwrapping
UV unwrapping is the process of generating a 2D image of your 3D model. Think of it as peeling the skin of an orange and laying it on a table. UV unwrapping is required for texturing your 3D game model. UV unwrapping allows you to paint every part of your asset’s surface.
Make sure to do the following while unwrapping:
- Place UV seams on the parts of the model that are not visible. This includes areas under the character’s armpits and other similar areas.
- Use as much space as possible for UV islands. Any wasted space is a wasted texture budget.
Use the following tools to unwrap your model in a professional pipeline:
- Blender’s UV editor
- RizomUV (a dedicated UV unwrapping tool)
- Maya’s UV toolkit
Procedural and hard-surface models may need additional help to unwrap. In these cases, you can use tools such as Blender’s UV project to export the model to another program and unwrap the UVs there. UV unwrapping is a critical step, so rushing it will cause visible issues on your textures when delivering a professional 3D Modeling Service.
Step 5: Apply Textures and Materials
It’s time to bring your 3D model to life with colors and materials. Texturing is a critical step in 3D modeling for games because it determines how the model will look in real-time. Most of the modern texturing practices use a PBR (Physically Based Rendering) pipeline that makes use of the following materials:
- Albedo / base color: dictates the color of the surface.
- Normal: adds surface details using a high poly model.
- Roughness: controls the surface reflectivity.
- Metallic: controls the degree to which the surface behaves like metal.
There are several ways to texture a 3D model. The most popular one is to use a painting software such as Substance 3D Painter. This is the preferred industry-standard solution. Quixel Mixer is another popular choice for those looking for a free option. Using AI tools to texture 3D models is also on the rise. Meshy’s AI texturing can help you generate textures from text prompts, speeding up the process dramatically for any 3D Model Company.
Step 6: Bake the Details from High Poly to Low Poly Game Asset
The baking process transfers the details from the high poly model to the low poly one using texture maps. This allows the low poly 3D model to retain the same visual appearance as the high poly one, with the performance benefits of a low poly mesh.
Normal maps are the most common type, but other texture types such as ambient occlusion are also useful and add visual details. It’s important to take the following into consideration when baking:
- Align the low poly model with the high poly one before baking.
- Use a ray distance to avoid baking artifacts, especially if the models are not touching.
- Use dedicated baking tools such as Substance 3D Painter, Marmoset Toolbag, xNormal (free), and Blender.
Note that baking is directly linked to retopology and texturing. Any issues with these steps will show up in the baking process.
Step 7: Rig the Character for Animation
The rigging process adds a spine to the model so that it can be animated. This step is necessary for any 3D model that needs to move.
Use the following steps and tools to create a rig:
- Create a basic bone hierarchy that approximates the character anatomy.
- Use weight painting to indicate how bones affect nearby surfaces.
- Paint the geometry so that it deforms correctly when animated.
- Use inverse kinematics (IK) to make the animation easier.
Use the following popular tools for rigging: Blender, Maya, and Mixamo.
The rigging process also helps to identify potential issues in the topology. It’s essential to have a clean topology with extra edge loops on deformable surfaces such as fingers and shoulders. Any issues with edge loops will show up when testing the rig. These issues can also be prevented using the manual retopology and the tools described in Step 3.
Step 8: Animate Your Game Character or Object
It’s finally time to give your character life. Animation is the process of moving 3D models using poses. There are several ways to animate your game object:
- Keyframe animation: define the frames manually in a keyframe animation software such as Blender or Maya.
- Motion capture: use a motion capture suit and a motion capture studio to animate the character. Rokoko and OptiTrack are popular solutions for this.
- Procedural animation: animating the character in the engine using procedural animation.
For indies, Mixamo offers free animations that can be applied to the character. Keyframe animation is a viable option if you’re new to 3D modeling and animation. You can animate the character manually in Blender using simple poses.
Step 9: Export Asset and Import into the Game Engine
The final step is to export the game asset to a game engine such as Unity, Unreal, or Godot. You can export the model using the following popular file formats.
- FBX: most widely supported file in the game development industry. It’s required for animating characters in most game engines.
- glTF: popular in web-based game engines.
- OBJ: a popular but outdated format that does not support animation.
Before importing the model into the engine, it’s vital to ensure that the following requirements are met:
- Scale and orientation are set correctly.
- The materials are set correctly.
- Polygon count is within the specified budget.
- Animations are working in the engine.
Note that some 3D game models can also be 3D printed. This is a great way to review and test physical copies of your asset.
What Are Common Pitfalls to Avoid in 3D Modeling for Games?
3D modeling for video games is an extremely challenging endeavor, and even the most experienced professionals make these mistakes.
- Skipping the retopology step altogether and trying to import a sculpted model directly into the engine.
- Avoiding UV seams, or placing them incorrectly. Seams placed on visible parts of the model can cause unsightly issues on the texture.
- Trying to simulate surface details with geometry instead of normal maps and other texture details. Most surface details can be faked with normal maps and PBR textures.
- Forgetting to test the model in the engine early and often. Everything looks fantastic in the DCC (Digital Content Creation) tool until you try it in the engine.
- Poor topology and rigging can cause unsatisfactory results, particularly when animating. The edge loops need to be in the right place to ensure that the character anatomy deforms realistically. It’s always important to keep the polygon count within reasonable limits and make sure the model is not wasting the texture budget.
- Forgetting to set the smooth shading and normals. This can cause the model to look faceted when it’s supposed to look smooth.
What Are Expert Tips for Creating Better 3D Game Assets?
These battle-tested expert tips will help you create better game assets in Blender.
- Blocking is usually faster than sculpting or polygonal modeling. Always start with simple shapes to define the model volumes.
- Always use references because even stylized characters need to look realistic. Use references for every project, and collect as many references as possible.
- Use AI assistance when needed. Use text-to-3D tools to generate assets, then refine the output. Remember that AI tools are only useful as a starting point.
- Always use the profiling tools to find performance and visual issues.
- Modular design is a must for every 3D game model. Creating assets that snap together will save you countless hours over the long run.
- Name everything correctly and organize your files in a logical manner. A good file organization is crucial when working with other people.
- Always learn the PBR metallic/roughness workflow because it is used in all modern game engines.
- Getting involved in the 3D modeling community can be a great way to improve and learn new tricks. Polycount and ArtStation forums are popular places to find inspiration and advice.
FAQs
What is the best 3D modeling software for games?
The right tool depends on the project and the individual’s capabilities, but the following tools are always a good option in 3D modeling for games:
- Blender: the best free option, covers all the pipeline stages.
- Maya and 3ds Max: industry standards that have been around for decades.
- Zbrush: the standard tool for sculpting.
- AI assisted: useful for rapidly generating assets. Some AI tools can generate 3D models from text, images, or a combination of the two. You can then refine the results in the DCC tool of choice.
These are only some of the most popular tools. In practice, most professionals use a combination of the tools mentioned above.
What is 3D modeling for video games?
3D modeling for video games is the process of making 3D assets for games. It includes all the steps necessary to generate a game-ready model that will look good in the engine while maintaining an acceptable polygon count.
Can ChatGPT create a 3D model for games?
ChatGPT is a text-based chatbot that is incapable of generating 3D model data. There are AI 3D tools that can generate game assets from text prompts, but they are separate.
How to optimize 3D models for games?
The following are tried and tested optimization tactics in creating game assets:
- Retopology to reduce the polygon count of the model.
- Using level of detail (LOD) models so that distant assets use fewer polygons.
- Baking high poly details onto a low poly mesh.
- Texture optimization by using appropriate texture sizes.
- Material optimization to reduce the draw calls.
- Profiling and performance optimization in the game engine.
How can I quickly build a whole mech fleet for a game project in one afternoon?
How to make a whole mech fleet in one afternoon, the Meshy way:
- Decide on an art direction. Write a one or two-sentence prompt block you will use for every mech you generate. This allows you to quickly iterate on a large number of variations. The example prompt block might look like this: “chunky low poly mech, weathered olive green armor plates, exposed yellow hydraulics, retro-futuristic silhouette, 90s anime inspired”.
- Generate eight to twelve mech variations using text-to-3D. Use the same prompt block but specify the role/silhouette for each mech: “scout mech, light frame, twin antennas”, “siege mech, four-legged, shoulder cannons”, etc. This will give you a good variety of mechs with the same visual style.
- Run a refine pass on the mechs to fill holes and fix non-manifold edges, then turn on Remesh to generate proper edge loops. Use AI Texturing to generate a variety of skins for the mechs. The same base mesh can have several skins applied to it using the same AI texturing process. This will give you dozens of visual variations on just a dozen mechs.
- Export the mechs to your preferred engine in .fbx or .glb format.
How do I evaluate whether an AI-generated 3D model is production-ready for a game (polycount, UVs, normals, textures)?
These are the must-have checkpoints for a production-ready 3D model in game development:
- Polycount falls within the acceptable range for the model’s purpose (character: 40K–60K, prop: 3K).
- Topology is clean and has the necessary edge loops for animation/clothes.
- UVs do not have seams on visible surfaces and have proper texel density.
- Normals are not inverted and have consistent smoothing groups.
- Textures are present and in the appropriate resolution for the model’s purpose.
- The object’s origin is at the feet (for characters) or the object’s center for other objects.
- The model uses a consistent scale with no extreme stretching.
How do I make a stylized knight character in Meshy?
How to make a stylized knight character in Meshy:
- Write a good prompt. The knight should have a defined silhouette and certain visual features. The following example prompt can be used: “stylized knight character, full plate armor, blue and gold heraldry, exaggerated pauldrons, cape, sword sheathed at hip, T-pose, fantasy game art, low poly hand-painted style”. Use a descriptive word for the silhouette, then the armor type, then color, then accessories, pose, and art style.
- Generate the character using the text-to-3D feature. Choose Meshy-6 as the model.
- Use Refine to fix holes and non-manifold edges, then Remesh to get a proper topology for rigging.
- Optional: Use AI Texturing to further stylize the character. You can use the following prompt: “hand-painted stylized texture, Blizzard art style, prominent color zones, painted highlights”.
- Use Animate to rig the character and apply idle/walk/attack animations.
- Export the character to your favorite engine as an .fbx or .glb file.
If the character looks too generic, iterate on the prompt before baking textures. You can also use Image-to-3D to generate more stylized characters by using the Multi-view mode.
What should I look for in an AI 3D generator to avoid unusable topology on a game-prototype character?
The following are the most critical factors to consider when choosing an AI 3D generator for game development characters.
- Quad dominance: triangles cause issues in shading and animation and should be avoided unless the project specifically requires them. The Remesh feature in Meshy is ideal for generating quad-dominant models.
- Edge loops: the edges should be in the right places for animation. Shoulder and knee loops, in particular, are needed to achieve a natural bend.
- Symmetry: symmetrical characters have mirrored weight painting on both sides, which makes the animation look more natural.
- Even polygon distribution: the character should not have clusters of polygons on certain parts. This is especially important for characters that need to flex.
- UV unwrapping: Meshy can generate UVs during the 3D generation process, which makes texturing much easier.
- Auto-rigging: the Animate feature in Meshy is an excellent indicator of a good topology for 3D character animation. It should be possible to animate the character without visible issues.
Conclusion
Creating game-ready 3D models requires careful planning and attention at every stage, from modeling and sculpting to texturing, rigging, and optimization. By following a structured workflow and using the right tools, you can produce high-quality assets that perform well in modern game engines. Whether you’re an independent creator or a professional studio, get in touch to learn how expert 3D modeling solutions can support your next game development project.